Your cart is currently empty!
+86 15863276370

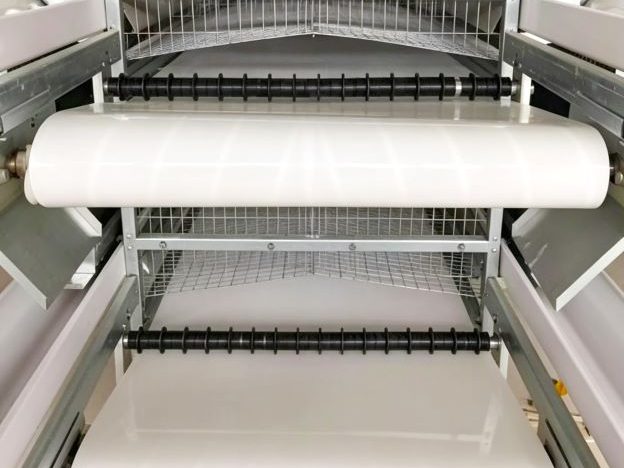
Belt misalignment (tracking off) is a common issue in floor rearing houses. Most cases are caused by uneven tension, non‑parallel rollers, or uneven load distribution. Follow these three steps to fix it yourself.

Step 1: Identify the direction and location
Run the belt empty and observe which side it shifts toward. If the belt runs to the right, the right side is too tight or the left side too loose. Mark the offset at the head and tail pulleys to distinguish between full‑belt drift vs. local twisting.
Step 2: Adjust the tail tension screws
This is the most effective method. If the belt tracks to the right, tighten the right‑side tension screw clockwise (increase tension on that side) and simultaneously loosen the left‑side screw counterclockwise. Adjust by ¼ turn each time, run the belt for 2–3 revolutions, and repeat until centered.
⚠️ Note: The total adjustment amount on both sides must be equal – tightening one side by ¼ turn means loosening the opposite side by exactly ¼ turn. Otherwise, the pulley will become skewed.
Step 3: Check head and tail pulley parallelism
If tension adjustment fails, measure the distance between both ends of the head and tail pulleys with a tape measure. If the deviation exceeds 5 mm (0.2 inches), loosen the mounting bolts and use shims or jacking screws to correct parallelism. Once parallel, tracking usually returns to normal.
Special Cases
- Local twisting: Check the belt joint for skew or damage; re‑weld or re‑splice if needed.
- Uneven load: Uneven manure distribution on the belt – adjust the scraper blade level.
Preventive Tips
Run the belt empty weekly for a quick check. Quarterly, measure bearing temperature with an infrared thermometer (should not exceed ambient +40°C / 104°F). Avoid overloading the belt beyond 120% of design capacity.
With this method, 90% of misalignment issues can be solved within 15 minutes without calling a technician.
Share this:
Other Posts
-
Automatic Feeding System: The “Nutrition Steward” for Broiler Farming
In large-scale broiler farming, scientific feeding is core to determining growth rate and feed conversion. Our independently developed automatic feeding system is designed for precise nutritional management. The system consists of a feed bin, conveying pipes, a drive motor, feed pans, and an intelligent controller, achieving fully automated feeding. Its advantages are significant: We provide…
-
Is Automation Upgrade Worth It? An ROI Analysis Model and Calculation Case for a 10,000-Bird Broiler Farm
This study builds an ROI model to evaluate automation upgrades for a 10,000-bird floor rearing farm. The model compares total investment (equipment + installation) against annual savings from labor, feed, medication, and mortality reduction. Key inputs: automated feeding system cost – 12,000;manuallaborcost–12,000;manuallaborcost–15/hour; feed waste reduction – 7%; mortality decrease – 2%; medication saving – 20%. Calculation:…
-
Linking Payback Period to Feed Savings: A Model for Automated Feeding Systems
The payback period of automated feeding systems directly correlates with feed savings achieved. A simple model expresses payback (months) = equipment cost / (annual feed saving × feed price). For a 10,000-bird house, automated feeders typically cut waste by 5–10%, saving 6–12 tons of feed yearly. At $450/ton, that equals $2,700–$5,400 annual saving. With equipment…
-
Nighttime Feeding and Light Regulation Strategies: Behavioral Intervention to Avoid High-Temperature Periods and Impacts on Growth Performance
High ambient temperatures suppress feed intake in broilers, reducing growth and feed efficiency. Nighttime feeding combined with adjusted light schedules offers an effective solution. By shifting feeding to cooler evening and early morning hours, birds consume more feed when heat stress is minimal. A light regimen of 4 hours light, 2 hours dark during nighttime…
Product Categories
Subscribe To Product News
Leave your email address and receive our latest product updates